How to request voice activated payments? Step by step
Learn, step by step, how to request voice-activated payments using virtual assistants such as Alexa, Google Assistant and Siri
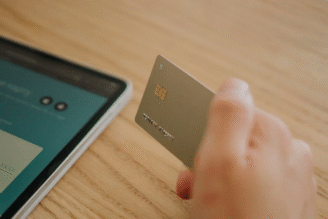
Learn how to request voice activated payments

Voice activated payments are revolutionizing the way we send and receive money. With the rise of smart speakers, mobile assistants, and integrated devices, it’s now possible to request payments simply by speaking. This hands-free approach adds convenience, speed, and often enhanced security to financial transactions.
But how exactly do you request a payment using your voice? This step by step guide will explain the process in detail.
What Are Voice Activated Payments?
Voice activated payments allow you to send or request money using voice commands via virtual assistants like Amazon Alexa, Google Assistant, Apple Siri, or Samsung Bixby.
Instead of opening an app and manually entering payment details, you just ask your device to handle the transaction.
The system then verifies your identity using voice recognition or additional security measures before processing the payment.
This technology is becoming more common as it integrates with banking apps and digital wallets such as PayPal, Venmo, Google Pay, or Apple Pay, making payments faster and easier for everyday users.
Step 1: Set Up Your Voice Assistant for Payments
Before you can start requesting payments by voice, you need to prepare your device and connect it with your payment methods.
The first step is to choose the voice assistant you want to use, whether it’s Alexa, Google Assistant, Siri, or another option.
After that, you open the corresponding app on your smartphone or tablet, such as the Amazon Alexa app or Google Home app.
Inside the app, link your preferred payment method, which could be a credit card, debit card, bank account, or digital wallet like PayPal.
Step 2: Understand Supported Payment Services
Not every payment service works with all voice assistants, so it is important to know which platforms are compatible with your device. Amazon Alexa, for example, supports payments via Amazon Pay and some third-party services, as well as linked credit cards.
Google Assistant works with Google Pay and some bank accounts linked through the Google Home app.
Apple Siri processes payments through Apple Pay and banking apps that support Siri commands, while Samsung Bixby is compatible with Samsung Pay and other linked methods.
If you want to request money from someone else, make sure that the recipient’s payment platform also supports voice requests through your assistant. Compatibility ensures the payment request can be sent and accepted smoothly.
Step 3: Learn the Correct Voice Commands
Each voice assistant requires specific commands to understand and process payment requests. For example, with Google Assistant, you might say, “Hey Google, request $50 from John via Google Pay.”
Alexa users could say, “Alexa, ask PayPal to send a payment request to Sarah for $100.” Siri commands could be phrased as, “Siri, request $25 from Emily using Apple Pay.”
Using the correct phrasing is essential so the assistant recognizes your intention and initiates the payment request.
It might take a few tries to get familiar with the exact wording, but most apps provide examples or voice command guides.
Step 4: Make the Payment Request
To request a payment by voice, you start by activating your voice assistant with its wake word, such as “Hey Google” or “Alexa.”
Then, clearly state the payment request command, specifying the amount and the recipient. The assistant may confirm the amount and the recipient’s name before sending the request. This step is designed to prevent mistakes.
After confirming, the assistant sends a payment request or notification to the recipient via the chosen payment platform.
Step 5: Receive and Manage Payment Requests
If someone else sends you a payment request using voice-activated systems, you will usually receive a notification on your device, through email, or within your payment app.
You then open the notification or app to review the details of the request. To complete the payment, you confirm and authorize the transaction, which might include verifying it with your voice or additional security measures like PIN or biometrics.
After authorization, the payment is processed and the transaction appears in your account. You can track payment requests and history directly within your payment app or the service’s website.
Step 6: Ensure Security and Privacy
Security is critical for voice-activated payments. Since voice commands can sometimes be intercepted or misheard, it is essential to set up strong protections.
Use a secure voice PIN or passphrase to authorize payments. Enable biometric verification if available, such as fingerprint or facial recognition, for added safety.
Two factor authentication on your payment accounts provides an additional layer of protection. Regularly review your transaction history to catch any unauthorized payments quickly.
Requesting payments using voice commands is a convenient and innovative way to manage money without needing to touch your phone or computer.
By properly setting up your voice assistant, linking payment accounts, learning the correct commands, and following secure practices, you can easily request and receive payments with your voice.
This technology is continuously improving and will likely become a standard payment method in the near future.
Embrace the convenience of voice activated payments and enjoy the simplicity of handling transactions hands free, anytime and anywhere.
Related content
How Buy Now, Pay Later Credit Card Works
Discover how Buy Now, Pay Later (BNPL) works with credit cards and its benefits.
Keep reading * You will remain on the current website